Zoho: Setting Up Refresh and Access Tokens
Introduction
All of Zoho platforms include an API that allows you to create or modify records externally. This is fundamental to software integration and allows automation between two or more systems. However, it also needs to be secure; you don't want others to be able to create and edit records of your system. For this reason, before any CRUD (create/read/update/delete) action is taken, a 'handshake' must be done to make sure the entity making the request is authorized to do so. To do this, both a refresh and access tokens are used in a protocol called OAuth.
In This Article
You will learn how to set up a refresh and access token for Zoho applications. This article will include:
- A brief description of OAuth
- A description of refresh and access tokens
- Finding out the correct scope
- Generating client id and secret for your application
- Generating a refresh token using the client id and secret
- Generating subsequent access tokens
Before You Begin
You will need to download and install Postman. This application is used for sending requests to API endpoints and can be downloaded here.
What is OAuth?
OAuth is an authorization protocol that needs to be done whenever a CRUD request is made to an external application. This is a widely-used standard, and one that is used across all Zoho applications. During the OAuth process, a client id and secret key are sent with a refresh token to an authorization endpoint to generate an access token. The access token is then sent with the CRUD request to let the application know that the entity is authorized to do so.
What are Refresh and Access Tokens?
As mentioned, refresh and access tokens are both required to authorize an application to make a CRUD operation on an external system. They are both required during OAuth and have some differences.
Refresh Token
This is a permanent token that is used to generate an access token. It will not change over each OAuth handshake.
Access Token
This is a temporary token that is sent with the CRUD request and typically has a lifespan of only 60 minutes.
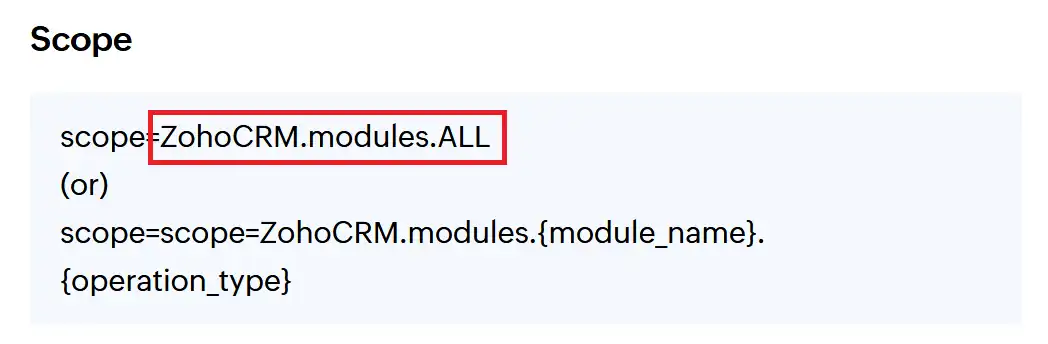
Finding the Correct Zoho Scope
This is the first step that needs to be done to generate a refresh and access token. Zoho has a lot of different applications and within each, there are multiple modules and entities (eg. Books has Invoices, Estimates, etc.). Moreover, there are different operations you can do with each like Update or Delete. In sum, the scope defines the:
- application (eg. CRM)
- module (eg. Deal)
- operation (eg. Create)
To find the scope you need, you will need to refer to the Zoho documentation of the application you wish to make an operation for. In this example, lets say we want to upsert (update and create) records in CRM. We would then visit their documentation to find the correct scope listed near the top:
Generating the Client ID, Secret Key, and Code
Once you have the scope, the next thing you'll need to do is create the Client ID, Secret Key, and Code. This needs to be done once for each refresh token.
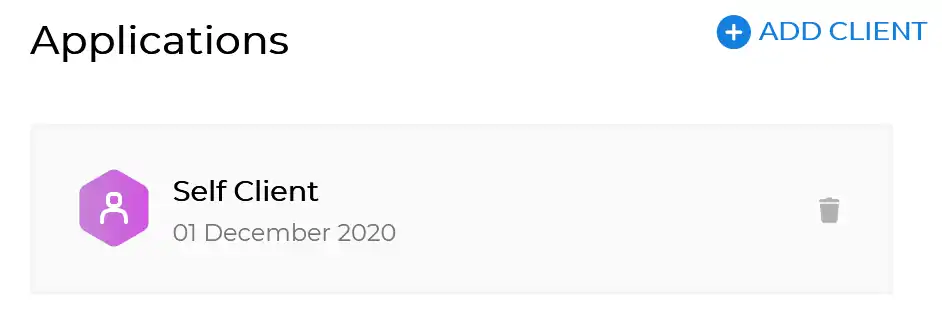
Set Up a Self Client
This is the first thing you need to do. Go to Zoho's API Console. Once there, click Add Client near the top-right of the screen and select Self Client. Once done, you should have a new option listed under Applications:
Finding Client ID and Secret
After the Self Client is set up, you can find the Client ID and Client Secret by clicking Self Client then clicking the Client Secret tab.
Generate a Code
Enter in the Scope (found in the previous section) set the Time Duration to be 10 minutes, and set the Scope Description to be anything (this is not used but required for this step). Once entered, press Create.
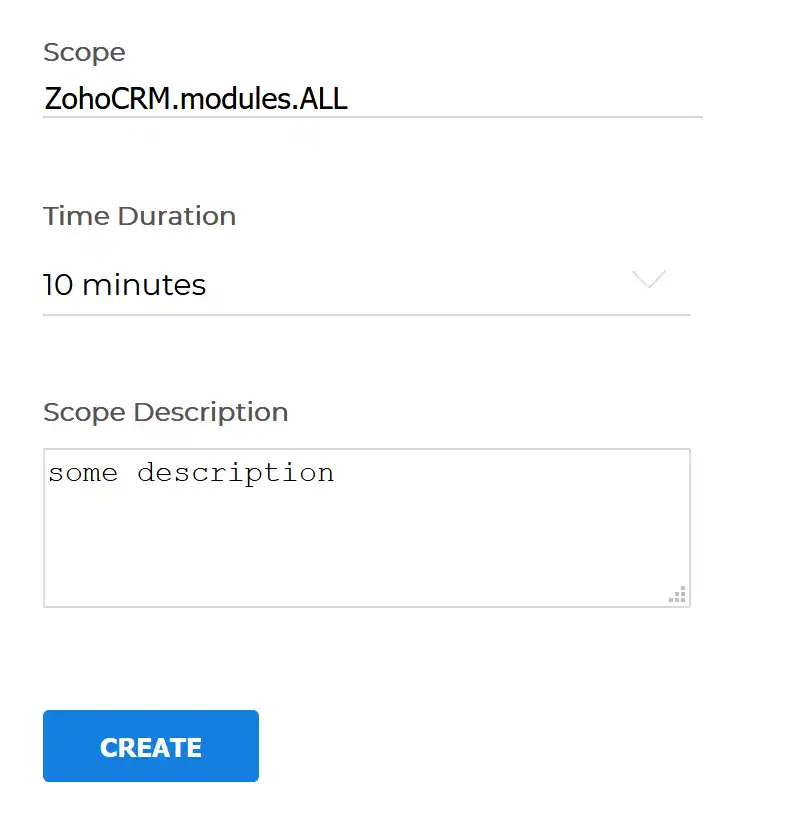
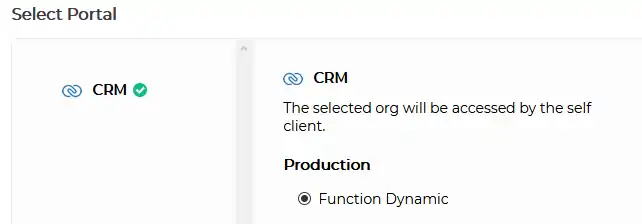
After you press Create, you will need to select which application you want to authorize. Select the correct instance (usually there is only one) and press Create again. This will generate the code for you.
Note: once you press Create, you will have 10 minutes (or the time you specified in Time Duration) to generate a refresh token before the code expires. Make sure to have Postman open before continuing.
Generating the Refresh Token
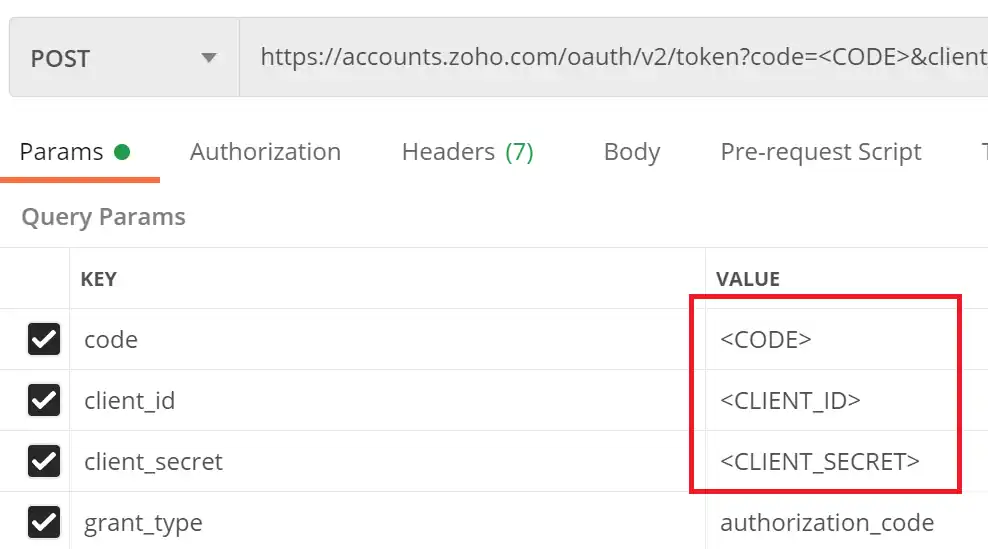
In Postman, you will now need to send a new POST request to the Zoho authorization endpoint, along with the Code, Client ID, and Client Secret. Copy the following URL into the URL bar in Postman:
https://accounts.zoho.com/oauth/v2/token?code=<CODE>&client_id=<CLIENT_ID>&client_secret=<CLIENT_SECRET>&grant_type=authorization_code Once pasted into the Postman URL bar, replace the following under Query Params:
- <CODE> with the Code generated in the API Console
- <CLIENT_ID> with your Client ID
- <CLIENT_SECRET> with your Client Secret
Press send and you will get the following JSON response that will contain your Refresh Token:
 {
 "access_token": "1000.ACCESS.TOKEN",
 "refresh_token": "1000.REFRESH.TOKEN",
 "api_domain": "https://www.zohoapis.com",
 "token_type": "Bearer",
 "expires_in": 3600
}
Copy and keep the value for refresh_token safe, since you will need this whenever you need to create an Access Token.
Generating Access Tokens
As stated earlier, access tokens have a short life and will need to be regenerated whenever the previous one expires. To do this, the following endpoint will need to be used:
https://accounts.zoho.com/oauth/v2/token?client_id=<CLIENT_ID>&client_secret=<CLIENT_SECRET>&refresh_token=<REFRESH_TOKEN>&grant_type=refresh_token While you can test this in Postman, this request should be handled by an application's back-end using a language like PHP, Node.js, Deluge, or C#. Once the response is received, you can then attach the Access Token in the header of the request with the following format:
Authorization: Zoho-oauthtoken <ACCESS_TOKEN> Was this helpful?
Share this article with the people you know: